Sunday, 28 February 2016

Thursday, 25 February 2016
Editing Session 7
In this final session of editing I would focus on adding the voice-over to the interrogation scene which I filmed previously in the most recent filming session.
The first thing I did when I opened Final Cut Pro on the iMac was import the recordings which I made on my iPhone. I then had to look though all the different recordings to see which ones were the most clear and the most effective for supporting the audience's knowledge of what is happening in the scene so they understand it in the best way possible.
After I had chosen the recordings that I wanted, I had to place them in time with the clip that I was talking about for example, when I said, "This man" (referring to CJ) I placed it perfectly in time with the picture of Jonny's character. I also did this when Matt's character's profile appeared on screen, which was effective as it gives background information to the readers and won't be too repetitive. In some cases I had to shorten the recordings so they would fit on the timeline with the clips they were paired with which was not a problem as I always made sure to record for an extra few seconds before and after I began to speak to assure nothing was cut off.
The first thing I did when I opened Final Cut Pro on the iMac was import the recordings which I made on my iPhone. I then had to look though all the different recordings to see which ones were the most clear and the most effective for supporting the audience's knowledge of what is happening in the scene so they understand it in the best way possible.
After I had chosen the recordings that I wanted, I had to place them in time with the clip that I was talking about for example, when I said, "This man" (referring to CJ) I placed it perfectly in time with the picture of Jonny's character. I also did this when Matt's character's profile appeared on screen, which was effective as it gives background information to the readers and won't be too repetitive. In some cases I had to shorten the recordings so they would fit on the timeline with the clips they were paired with which was not a problem as I always made sure to record for an extra few seconds before and after I began to speak to assure nothing was cut off.
Tuesday, 23 February 2016
Editing Session 6
After some feedback from my peers and teachers I decided to add the split screen effect into my opening scene allowing me to create a sort of character profile.
The first thing I did was take a picture of the two criminal characters. I asked both Jonny and Matt to meet with me to do a mini photo shoot so I could obtain an image of them both a sort of mug shot-like format. After I had taken the picture I uploaded them to the iMacs and added them to my timeline sequence on Final Cut Pro X. I then used the transition button to move the images to the left hand side and also stretch them so they took up half of the screen.


I then added another slide on top of the image so it appeared along side it. Just like before I had to alter the size of the slide so it was on the screen half and half with the image of the criminal. I could then add text to the slide of which I just put basic information on such as their name and current location. I think doing this was very effective as it allowed the audience to understand what was happening, without the text they may have misunderstood the scene and not known that the character in the interrogation room was actually the criminal that was arrested earlier in the narrative.
The first thing I did was take a picture of the two criminal characters. I asked both Jonny and Matt to meet with me to do a mini photo shoot so I could obtain an image of them both a sort of mug shot-like format. After I had taken the picture I uploaded them to the iMacs and added them to my timeline sequence on Final Cut Pro X. I then used the transition button to move the images to the left hand side and also stretch them so they took up half of the screen.


I then added another slide on top of the image so it appeared along side it. Just like before I had to alter the size of the slide so it was on the screen half and half with the image of the criminal. I could then add text to the slide of which I just put basic information on such as their name and current location. I think doing this was very effective as it allowed the audience to understand what was happening, without the text they may have misunderstood the scene and not known that the character in the interrogation room was actually the criminal that was arrested earlier in the narrative.
Monday, 22 February 2016
Filming Session 3
One outstanding piece of feedback that I got as a result of my opening sequence sketch was that the dialogue in the interrogation scene was not very clear and so it may be a better idea to add a voice over of me narrating the scene instead.
The first thing I needed to do was write out a script for myself so I knew what I was saying when I came to record the voice over. I used my research on voice-overs to help me think of a good monologue type script that would suit the scene and go in time with the footage. I thought it would be best to start by talking about the need to find the missing character to give background information to the audience, leading on from that I wanted to talk about the criminals as their character profiles and picture show on screen. I included the line, "No clues, no leads, no hope," twice in the voice-over which was inspired by the voice-over in the first scene of trainspotting where the line, "choose life" is used twice. I think doing this is effective because it gets a message through to the reader which in my case is that the criminal being interrogated is their last hope at finding the missing character because without him they have nothing.
I recoded the voice-over using my iPhone 5s which gets fairly good sound quality and when recording I made sure there was complete silence in the room I was in so the sound was not muffled like in the sketch product. Furthermore I chose to record me saying each line as appose to just recording the whole thing as this meant I wouldn't need to keep re-doing the whole thing if I made one mistake
The first thing I needed to do was write out a script for myself so I knew what I was saying when I came to record the voice over. I used my research on voice-overs to help me think of a good monologue type script that would suit the scene and go in time with the footage. I thought it would be best to start by talking about the need to find the missing character to give background information to the audience, leading on from that I wanted to talk about the criminals as their character profiles and picture show on screen. I included the line, "No clues, no leads, no hope," twice in the voice-over which was inspired by the voice-over in the first scene of trainspotting where the line, "choose life" is used twice. I think doing this is effective because it gets a message through to the reader which in my case is that the criminal being interrogated is their last hope at finding the missing character because without him they have nothing.
I recoded the voice-over using my iPhone 5s which gets fairly good sound quality and when recording I made sure there was complete silence in the room I was in so the sound was not muffled like in the sketch product. Furthermore I chose to record me saying each line as appose to just recording the whole thing as this meant I wouldn't need to keep re-doing the whole thing if I made one mistake
Editing Session 5
In this session I focused on the film titles that would need to be shown throughout the opening scene stating who produced, distributed, filmed, edited and starred in it. In my initial sketch product it was pointed out that my titles were not at a good level as the names of the actors were just simply listed at the end of the sequence which never happens in film. I also didn't add the motion logo for my own production company or my chosen distribution company- Sony Pictures Entertainment.
Primarily I needed to add then Sony Pictures introduction logo to the start of my scene as this will immediately show who has distributed my film and generally make it look more professional. To do so I firstly needed to find the motion logo on YouTube before then copying it into www.clipconverter.com where I was able to add it to my timeline on Final Cut Pro X. I also had to think about creating and adding a motion logo for my production company- JT Pictures. Prior to this editing session I had done some research on titles and logos to inspire my own, conclusively I found that the text needed to be large and bold as well as being unique so it stands out to the audience. I began by clicking 'Titles' then scanned through the different options occasionally trialling the occasional one I saw to see if I liked it. The main contender in the end was the 'Atmosphere' title which I decided against because I thought it was too similar to the Universal logo/title. In the end I went with 'Trailer' which I mixed the soundtrack 'inner beauty' which I found on Final Cut Pro X songs. The soundtrack worked really well with the motion logo and was in time almost perfectly in time with it.
Next I needed to add the on screen film titles which included names of the actors starring in the film, the editor and filming crew. I tried to make the titles more effective with the use of transitions to make them go along with the action occurring on screen at that moment. For example, when the two characters get out of the car I thought it would be effective if I were to use a text that mimics the character's actions. The 'Tracking' text did this perfectly as it separates and spaces out which is similar to what the two criminals do when they start to walk towards the bank.
Similarly, when Jonny's character begins to run towards the field it now says, 'Starring Jonny Bennit' I felt this was the right place to use this title because it sums up the character in one scene. In the scene it shows CJ betraying his 'partner' and running off with the money which ultimately is what he is about- he doesn't trust anyone and is a lone wolf. I made his text move sideways to mimic him running away from the police. I showed the title for Matt when he is being arrested because it also sums his character up as vulnerable.
The last thing I needed to do was add the film title for the name of my film. I knew from the start that I wanted my title to be large, bold and ideally 3D as it would stand out more. The font I used in the end was 'Old Steel' on 3D styles because I thought it worked well with the strong theme of prison and the interrogation room.
Primarily I needed to add then Sony Pictures introduction logo to the start of my scene as this will immediately show who has distributed my film and generally make it look more professional. To do so I firstly needed to find the motion logo on YouTube before then copying it into www.clipconverter.com where I was able to add it to my timeline on Final Cut Pro X. I also had to think about creating and adding a motion logo for my production company- JT Pictures. Prior to this editing session I had done some research on titles and logos to inspire my own, conclusively I found that the text needed to be large and bold as well as being unique so it stands out to the audience. I began by clicking 'Titles' then scanned through the different options occasionally trialling the occasional one I saw to see if I liked it. The main contender in the end was the 'Atmosphere' title which I decided against because I thought it was too similar to the Universal logo/title. In the end I went with 'Trailer' which I mixed the soundtrack 'inner beauty' which I found on Final Cut Pro X songs. The soundtrack worked really well with the motion logo and was in time almost perfectly in time with it.
Next I needed to add the on screen film titles which included names of the actors starring in the film, the editor and filming crew. I tried to make the titles more effective with the use of transitions to make them go along with the action occurring on screen at that moment. For example, when the two characters get out of the car I thought it would be effective if I were to use a text that mimics the character's actions. The 'Tracking' text did this perfectly as it separates and spaces out which is similar to what the two criminals do when they start to walk towards the bank.
Similarly, when Jonny's character begins to run towards the field it now says, 'Starring Jonny Bennit' I felt this was the right place to use this title because it sums up the character in one scene. In the scene it shows CJ betraying his 'partner' and running off with the money which ultimately is what he is about- he doesn't trust anyone and is a lone wolf. I made his text move sideways to mimic him running away from the police. I showed the title for Matt when he is being arrested because it also sums his character up as vulnerable.
The last thing I needed to do was add the film title for the name of my film. I knew from the start that I wanted my title to be large, bold and ideally 3D as it would stand out more. The font I used in the end was 'Old Steel' on 3D styles because I thought it worked well with the strong theme of prison and the interrogation room.
Split screen research
The titles in the initial draft of my film were listed at the end of the film which is not very proffesional. I know this because after looking at a variety of titles in existing films I found that in almost of them the titles appear on screen one after another throughout the opening sequence. It was pointed out, by my target audience, that it may be a good idea to use a split screen to introduce some of the characters using a split screen where I use a mug shot of the criminals in one half and a description of their criminal activity in the other.
In film production, split screen is an editing technique used to divide the screen, traditionally in half, however also in multiple simultaneous images. It can be done on final cut pro by adding two peices of media at the same point on the timeline and crop both images to halfway so they are equally on the screen . I will look at some examples of media products where this technique is used so I can see if they are useful.
In this mean girls clip the four girls have a group phone call and the split screen demonstrates this really well as it shows that all the girls' actions simultaneously to the others. The audience are very clear with what is happening in the scene because the split shows which characters are talking to which. The split sceen is a good technique to use to show events occuring at the same period of time.
In this clip, the split screen has a different purpose. It juxtaposes the male and female character because it shows them both giving completely different responses to the same questions, for example, when asked, "Do you know what this is about?" the female character responded with "Duh, I'm not an idiot," whereas the boy replied with a shake of a head. The split screen establishes that they are going through the same things because they are being told the same sort of things but their opposing responses connote their different personalities.
Overall I think that I am going to use a split screen as it allows the audience to consume the text in the most appealing way to them. The uses and graftification model will be a large part of my opening scene meaning the power lies in the hands of the audience, thus the split screen effect will allow them to take more controll when watching the film as it makes it easier to understand.
In film production, split screen is an editing technique used to divide the screen, traditionally in half, however also in multiple simultaneous images. It can be done on final cut pro by adding two peices of media at the same point on the timeline and crop both images to halfway so they are equally on the screen . I will look at some examples of media products where this technique is used so I can see if they are useful.
In this mean girls clip the four girls have a group phone call and the split screen demonstrates this really well as it shows that all the girls' actions simultaneously to the others. The audience are very clear with what is happening in the scene because the split shows which characters are talking to which. The split sceen is a good technique to use to show events occuring at the same period of time.
In this clip, the split screen has a different purpose. It juxtaposes the male and female character because it shows them both giving completely different responses to the same questions, for example, when asked, "Do you know what this is about?" the female character responded with "Duh, I'm not an idiot," whereas the boy replied with a shake of a head. The split screen establishes that they are going through the same things because they are being told the same sort of things but their opposing responses connote their different personalities.
Overall I think that I am going to use a split screen as it allows the audience to consume the text in the most appealing way to them. The uses and graftification model will be a large part of my opening scene meaning the power lies in the hands of the audience, thus the split screen effect will allow them to take more controll when watching the film as it makes it easier to understand.
Sunday, 21 February 2016
Voice-over narration
After releasing my initial sketch of my opening film sequence my teacher, Miss Hitchins, advised me to get rid of the dialogue in the interrogation part of the sequence because it was quiet and muffled. I have to say I agree with this comment because I know it was difficult to hear what was being said because the room we were filming in was quite echoey meaning the sound was muflled. I would like to replace the muffled ambient sound with a voice over narration of my own. In this post I will research existing texts containing voice-overs so I can apply the knowledge to my own work.
Voice-over is a production technique where a character is narrating over the clip. This technique is done in a lot of British dramas as it creates a different perspective and can make things more easy to understand. It makes viewers think about how the story has developed and what it is like to have this different view other than seeing it visually. The purpose is to understand the story and moods better and understand the thoughts or feelings of the narrator and how important the story is.
One example of a British film that contains a voice over narration is Trainspotting which was used really effectively as it helps the audience gain an insight into the characters mind so they know how he is feeling. One of the most famous voice-over sequences is the first scene of this film, Renton- the main character- begins and ends the monologue with' "Choose life," which appears as a sort of message or lesson to the audience. This is good because the audience imediately knows what the moral or lesson of this narrative will be and so therefore it will be a lot easier for them to understand the text.


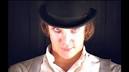
When I come to recording my own voice-over I will now know what I must include in order for it to be effective. I will need to reveal the characters thoughts and opinions about the situation to assure that the audience know how he feels towards the criminals. I also found that when speaking over the action the tone of voice is very stern and consistant which is something I will try and use to connote the seriouse expression the character has for the situation.
Voice-over is a production technique where a character is narrating over the clip. This technique is done in a lot of British dramas as it creates a different perspective and can make things more easy to understand. It makes viewers think about how the story has developed and what it is like to have this different view other than seeing it visually. The purpose is to understand the story and moods better and understand the thoughts or feelings of the narrator and how important the story is.
One example of a British film that contains a voice over narration is Trainspotting which was used really effectively as it helps the audience gain an insight into the characters mind so they know how he is feeling. One of the most famous voice-over sequences is the first scene of this film, Renton- the main character- begins and ends the monologue with' "Choose life," which appears as a sort of message or lesson to the audience. This is good because the audience imediately knows what the moral or lesson of this narrative will be and so therefore it will be a lot easier for them to understand the text.
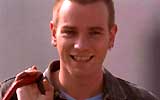
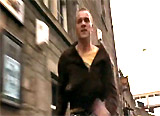
Another British drama film that has a voiceover is, 'A Clockwork Orange' which is one of the most successful British Drama films ever to be made. All of Alex's Voice-overs have an expository function. A First-person Voice-over automatically focuses attention on the presence of the speaker. Even those Voice-overs that have other functions provide basic information about setting and action. Alex's voice is essential to his character. Through the voice over he reveals his mind- what he's thinking and feeling, his perceptions and judgments about what he experiences. His creative use of slang in this speach demonstrates his wit and imagination.
When I come to recording my own voice-over I will now know what I must include in order for it to be effective. I will need to reveal the characters thoughts and opinions about the situation to assure that the audience know how he feels towards the criminals. I also found that when speaking over the action the tone of voice is very stern and consistant which is something I will try and use to connote the seriouse expression the character has for the situation.
Subscribe to:
Posts (Atom)